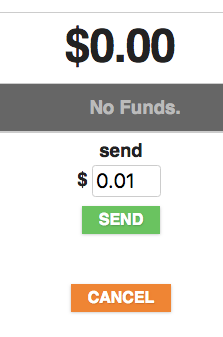
One of the functions I found the most interesting was the ability to send some value, in this case xDai, to someone using a link (try out the app here). The functionality behind this method is pretty cool and makes use of a lot of web3/crypto fundamentals. I found it interesting to dig into it and thought it would be worth sharing.
To Begin
First of all, the Dapp isn’t really ‘sending’ the xDai, it’s more of a deposit/claim pattern with some cool cryptography used to make sure only the person with the correct information, provided by the sender via the link, can claim the value.
Secondly there are two parts — the web Dapp and the smart contract on the blockchain. The web Dapp is really just a nice way of interacting with the smart contract.
Step By Step
A step by step description helped me get it into my head. Please note that I’m not showing all the details of the code here, it’s more a high level description to show the concept.
Sending
Using the Dapp the ‘sender’ enters the amount they want to send from and hits send.

Once send is hit the Dapp does a bit of work in the background to get the inputs required by the smart contract set-up.
The Dapp uses web3.js to hash some random data:
let randomHash = web3.utils.sha3("" + Math.random());
Now the Dapp uses web3.js to generate a random account which will have a private key and a public key:
let randomWallet = web3.eth.accounts.create();
The random hashed data is then signed using the random wallet private key (see below for more details on signing, etc):
let sig = web3.eth.accounts.sign(randomHash, randomWallet.privateKey);
The Dapp sends a transaction to the blockchain smart contract with the value equal to the amount that is being sent along with the signature and the hashed data:
Contract.send(randomHash, sig.signature), 140000, false, value ...
// This is just a pseudo code to give the gist, see the repo for the full code
The smart contract contains a mapping of Fund structures to bytes32 ID keys:
struct Fund {
    address sender;
    address signer;
    uint256 value;
    uint256 nonce;
    bool claimed;
}

mapping (bytes32 => Fund) public funds;
When the Dapp ‘sends’ the value the smart contract creates a new Fund structure with the signer field set to the public key of the random wallet created by the Dapp. This field is important as it is used as the check when a claim is made:
newFund = Fund({
    sender: msg.sender,
    signer: randomWallet.publicKey,
    value: msg.value,
    nonce: nonce,
    claimed: false
})
Now the newFund is mapped using the randomHash value as the key:
funds[randomHash] = newFund;
The xDai from the sender has now been sent to the smart contract and is ready to be claimed by anyone with the required information.
Finally the Dapp generates a link with the randomHash and random wallet private key as the link parameters:
Link Format: xDai.io/randomHash;privateKey
The link can then be copied and sent via WhatsApp, SMS, etc.
The Claim:
Here it’s probably worth noting the link is really just a nice way to share the important information required to claim the xDai. The Dapp also does the hard work of interacting with the blockchain smart contract.
When the link is visited the Dapp parses the randomHash and the privateKey from the link.
It then signs a message using the privateKey from the link:
let accountHash = web3.utils.sha3(claimAccount);
let sig = web3.eth.accounts.sign(accountHash, privateKey);
Now the smart contract claim function is called using the signature and the original data:
Contact.claim(accountHash, sig, randomHash, claimAccount)
The Solidity ecrecover function is used to get the public address from the signature (this is the magic, see the info below):
address signer = recoverSigner(accountHash, sig);
Finally, the smart contract checks the fund with key matching randomHash has the ‘signer’ equal to the address recovered from the signature. If it does then it can send the value to the claimers account:
if(funds[randomHash].signer == signer && funds[randomHash].claimed == false){
    funds[randomHash].claimed = true;
    claimAccount.send(funds[randomHash].value);
}
Phew, that’s it! It feels like a lot going on but the basics is it’s a smart way for a user to store value in a smart contract that can only be claimed with the correct information without showing what that information is on the public blockchain.
The Cool Crytography
Signing, ecrecover, eh what?? There’s some things that are probably worth going into a bit more detail.
Wallets, Accounts, etc
An account generated with web3.eth.accounts.create() has it’s own a private key and public key. More info can be found in the docs and here. The private and public keys are linked through an algorithm that has signing and validation properties.
Signing & Validating
The following is a very brief summary of this helpful post.
Signing is the act of a user “signing” data that anyone can validate came from that user.
The signing function will take in a private key and the data. The output will be another string that is the signature.
To validate the signature is from the owner of the private key the signature, the original data and the public key is required.
A validator function is run that recovers the public key from the signed data.
The recovered public key is then compared to the original one and if both are the same the signature is valid.
ecrecover
In this case the Solidity ecrecover (Eliptic Curve Recover) function is used to recover the address associated with the public key. The recoverSigner function in the smart contract code shows an example of how this is done and this is a pretty decent explanation of what is going on.
I think that’s a pretty awesome example of crypto in action!